
Sheet pan pancakes take the familiar flavor of homemade pancakes and turn it into one hands-off oven breakfast. Instead of standing at the stove and flipping one batch after another, you pour the batter into a greased 9-by-13-inch pan, bake until the center is set, and cut it into squares. Everyone can sit down to warm pancakes at the same time, which is particularly useful on school mornings or when you are feeding guests.
This version uses ordinary pantry ingredients: flour, baking powder, milk, eggs, butter, and vanilla. It is not a thin crepe or an oversized griddle pancake. A baking pan produces a soft, lightly golden pancake slab with clean edges. Follow the measured recipe card for the batter, then use the guidance below to adjust toppings, avoid a wet center, and make leftover squares easy to reheat.
Why Make Pancakes in the Oven?
A skillet is still excellent when you love individually browned edges, but it requires attention. The oven distributes heat around the whole pan, so you do not need to keep a stack warm while cooking later batches. The result is also easy to portion. Cutting twelve squares gives you an approximate serving plan, and you can offer smaller or larger pieces depending on the meal.
Oven-baked pancakes do taste a little different from pan-fried pancakes. You will not get a separately browned, buttery surface on every piece, and the center tends to stay more cake-like. That is part of the appeal, not an error. If you want traditional skillet pancakes instead, use our fluffy homemade pancakes recipe, which explains griddle heat and flipping cues in detail.
Ingredients That Make a Tender Pancake Slab
All-purpose flour provides the structure, while baking powder lifts the batter as it heats. Milk brings the dry ingredients together, eggs help the pancake hold its shape, and melted butter gives the finished squares a soft, rich bite. A little sugar and vanilla round out the flavor without making a heavily sweet breakfast. You can leave the optional berries off and add fresh fruit after baking.
For this recipe, measure two cups of flour by spooning it into the measuring cup and leveling the top, rather than digging the cup straight into a tightly packed bag. Too much flour can make the squares dry and dense. Use fresh baking powder; an old container that has lost its lift can leave the center compact even when the surface looks golden.
Choose the Right Baking Pan
The tested proportions are intended for a 9-by-13-inch metal baking pan. This matters because batter depth controls cooking time. A much larger half-sheet pan spreads the mixture thin, so the edges may dry before the center develops its texture. A smaller dish makes the middle thicker and may require substantially longer in the oven. Choose the specified pan for a predictable first attempt.
Grease the bottom and corners well, or line the base with parchment and lightly grease the exposed sides. Parchment makes lifting the slab easier, but it should lie flat so the batter does not pool under folds. Metal generally conducts heat more efficiently than heavy ceramic or glass. If you change the material, look for the actual doneness cues instead of assuming the suggested minutes will transfer exactly.
How to Make Sheet Pan Pancakes
Step 1: Preheat the Oven and Prepare the Pan
Set the oven to 425°F (220°C) before you start mixing. Grease a 9-by-13-inch metal baking pan, especially around the corners where batter tends to catch. Let the oven finish preheating; putting batter into a cooler oven can change the rise and leave an unexpectedly pale top.
Step 2: Whisk the Dry Ingredients
Combine the flour, baking powder, sugar, and fine salt in a large bowl. Whisk until the mixture is uniform. This is the moment to break up baking powder clumps, since dry pockets may remain noticeable after the liquid is added.
Step 3: Mix the Eggs, Milk, and Butter
In a separate bowl whisk together the eggs, milk, melted and slightly cooled butter, and vanilla. The butter should not be hot enough to cook the eggs on contact. Keeping the dry and wet mixtures separate until the last moment also prevents unnecessary mixing.
Step 4: Fold the Batter Gently
Pour the liquid mixture into the flour and use a spatula to fold until there are no dry streaks. A few small lumps are normal. Beat the batter too vigorously and the pancake may turn springy or tough instead of soft. Avoid adding extra flour simply because the mixture looks pourable; oven pancake batter should flow into the corners of the pan.
Step 5: Spread and Add Toppings
Scrape the batter into the prepared pan and smooth it into an even layer. Scatter berries over one half if you want both plain and fruit-topped squares from the same batch. Do not pile watery fruit in one corner; concentrated liquid can leave a gummy patch beneath the topping.
Step 6: Bake Until the Center Is Set
Bake for approximately fifteen to twenty minutes. Check for a lightly golden surface, a center that no longer jiggles like raw batter, and a toothpick that comes out without wet mixture attached. A few moist crumbs are acceptable. The exact bake time varies with pan material, oven calibration, and the amount of fruit you used.
Step 7: Rest, Slice, and Serve
Let the slab stand for three to five minutes before cutting twelve squares. This short rest makes the edges cleaner and the crumb less fragile. Serve with yogurt, fresh berries, or a modest drizzle of maple syrup. For a buffet, put toppings in separate bowls so the pieces do not become soggy while everyone is serving.
Easy Ways to Divide the Pan into Flavors
Try a half-and-half arrangement when people in the family like different toppings. Press sliced strawberries onto one side and leave the other plain. You can also place blueberries in a few rows, or sprinkle a small amount of cinnamon over part of the surface. Keep toppings light enough that they do not sink to the bottom and create wet spots.
Chocolate chips are another possibility, but their sweetness is very different from fresh fruit. Use a small scattering rather than covering the entire surface. If you prefer a banana flavor throughout the batter, start with the dedicated banana pancake recipe rather than adding several mashed bananas to this pan without reducing other liquid. Banana changes both the baking structure and moisture.
Why Are My Sheet Pan Pancakes Flat or Gummy?
A flat slab is not always a failed batch; this style is usually thinner than a tall restaurant pancake stack. However, a dense interior often comes from expired baking powder, too much flour, or batter that was beaten excessively. Check the baking powder, measure carefully, and fold rather than whisk hard once the flour meets the milk.
A gummy center usually means the slab needed more time, the oven ran cool, or the toppings released too much liquid. Return the pan to the oven for a few minutes if the middle is still visibly wet, and cover loosely with foil if the top is darkening too fast. Do not mistake melted butter or syrup on the surface for uncooked batter; check the middle of a plain area with a toothpick.
If the edges become dry while the middle lags behind, check the pan size. An overly thick layer in a smaller dish needs more time than these proportions assume. Spreading the mixture evenly and placing the pan on the center rack help avoid hot spots. Do not crank up the temperature to compensate for a slow center; that usually exaggerates the difference between edges and middle.
How to Keep Oven Pancakes Warm
The easiest serving plan is to bake the pancake slab just before breakfast. If other dishes need finishing, leave the cut squares on a baking tray in a very low oven briefly, without sealing them tightly under foil. Trapped steam can soften the surface. A warm oven is a holding method, not a substitute for cooking an underdone center.
For a crowd, serve the fruit, yogurt, and syrup separately. The pancake squares stay neater and guests can choose what they prefer. If breakfast includes eggs or another hot dish, coordinate the timing so the pancake pan is coming out as the rest of the meal is ready. That is where this method saves the most attention.
Make-Ahead, Freezing, and Reheating
Cool leftover squares promptly, then refrigerate in a covered container within two hours. Separate stacked pieces with parchment so they do not stick. For longer storage, freeze cooled squares in a single layer first and then pack them into a freezer-safe bag. Mark the date and take out only the number of portions you expect to use.
A toaster oven is convenient for reheating one or two pieces; use a moderate setting and check frequently so the edges do not dry out. For several pieces, arrange them in a single layer on a baking sheet and warm until heated through. Microwave reheating is faster but gives a softer texture. Keep berry toppings and yogurt separate until serving.
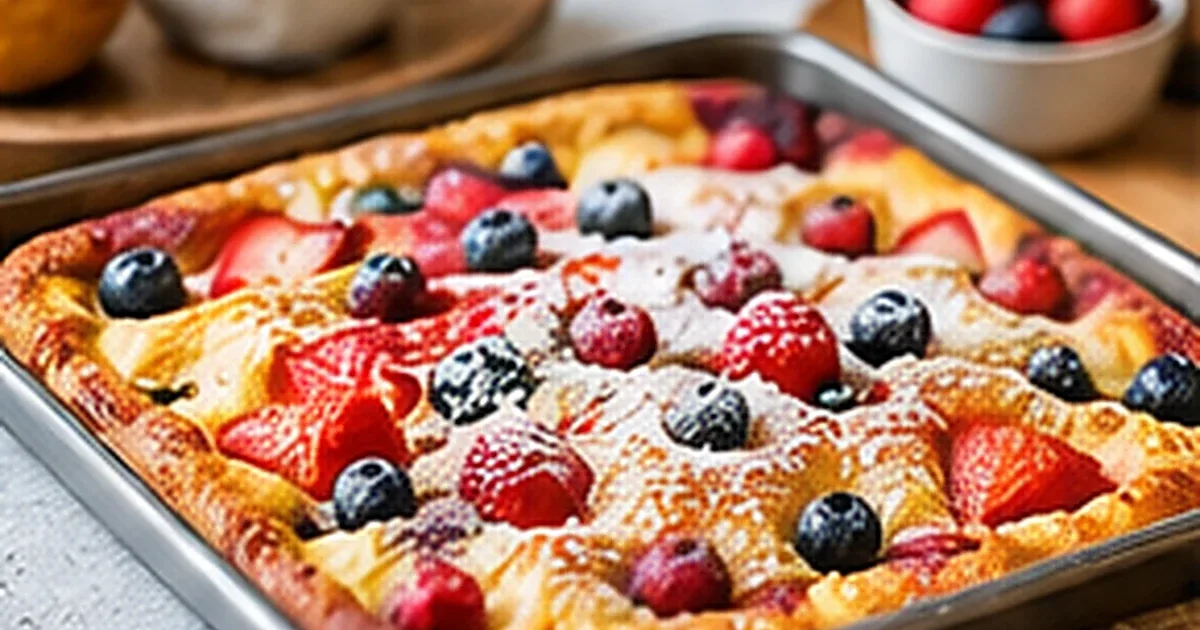
Fluffy Sheet Pan Pancakes for a Crowd
Ingredients
Equipment
Method
- Heat the oven to 425°F (220°C). Grease a 9-by-13-inch metal baking pan generously, including the corners.
- Whisk flour, baking powder, sugar, and salt together in a large bowl.
- In a separate bowl, whisk eggs, milk, melted butter, and vanilla until blended.
- Pour wet ingredients into dry. Fold gently until no dry pockets remain; small lumps are fine.
- Spread the batter evenly in the prepared pan; add berries over one half if desired.
- Bake 15–20 minutes, until the center is set, the surface is lightly golden, and a toothpick comes out without wet batter. Oven and pan differences affect timing.
- Cool 3–5 minutes, cut into 12 squares, and serve with yogurt, fruit, or maple syrup.
Notes
Frequently Asked Questions
Can I bake pancakes in a regular sheet pan?
You can, but a large half-sheet pan changes the batter depth. This recipe is written for a 9-by-13-inch metal pan. A larger pan will require different timing and may produce thinner, drier pancakes.
Can I add blueberries or strawberries to the batter?
Yes. Scatter a moderate amount over the surface just before baking. Avoid heavy piles of juicy fruit, which can keep patches of batter damp.
Do I need to flip sheet pan pancakes?
No. Heat reaches the slab from the oven and the baking pan. Just bake until the center is set, rest briefly, and cut into squares.
Why are oven pancakes different from skillet pancakes?
The bottom browns against a pan while the top bakes in circulating heat, so the texture is softer and more uniform. Skillet pancakes develop a browned surface on each individual portion.
Can I make sheet pan pancakes for meal prep?
Yes. Bake, cool, portion, and refrigerate promptly or freeze. Reheat only the squares you plan to serve, and add fresh toppings afterward.
Make This Your Next Family Breakfast
Sheet pan pancakes are not meant to replace every griddle breakfast; they are meant to make breakfast simpler when everyone needs to eat together. Keep the batter gentle, use the intended pan, and trust the center-set test. Once you know how this batch bakes in your oven, you can vary the fruit on top while relying on the same basic method each time. For more pancake troubleshooting, visit the main pancakes guide.