
Classic chicken pot pie combines a buttery crust with a creamy filling of cooked chicken, carrots, peas, and celery. The best result is not just a golden top: the sauce should be thick enough to stay inside a slice without becoming pasty, and the bottom crust should bake rather than soak in liquid.
This version uses two prepared nine-inch pie crusts and fully cooked chicken, which keeps the method approachable. You will make a roux, whisk in broth and milk, fold in the chicken and vegetables, then bake the filled pie until the pastry is golden and the center is hot.
The Anatomy of a Perfect Pot Pie
To master this dish, one must understand its two primary components: the pastry and the filling. A failure in either can compromise the entire experience. A crust that is too tough or a filling that is too runny are common pitfalls that even experienced home cooks encounter.
The filling is where the flavor profile is built. It isn’t just about the chicken; it’s about the sauce that binds everything together. A traditional pot pie uses a velouté or a béchamel base. By sautéing aromatics, onions, carrots, and celery (the classic mirepoix), and then adding flour to create a roux, you establish a thickener that will hold up even after the pie is sliced. The addition of chicken stock and a touch of heavy cream creates a luxurious mouthfeel that coats the ingredients perfectly.
Understanding the Perfect Roux
A common mistake in making Chicken Pot Pie is a filling that turns into a soup once the crust is broken. To prevent this, you must master the roux. A roux is a mixture of equal parts fat and flour. For this dish, we cook the roux just until it loses its raw flour smell but before it begins to brown deeply. This ‘blond roux’ has the highest thickening power. When adding your liquid (chicken stock and milk), do so slowly, whisking constantly to prevent lumps. The sauce should be thick enough to coat the back of a spoon heavily.
How the Filling and Crust Work Together
Assembly is an art form. Start by lining your pie dish with the bottom crust, ensuring there is enough overhang to crimp the edges. Once the filling has cooled slightly, this is crucial to prevent the bottom crust from melting, pour it into the shell. Place the top crust over the filling, trim the edges, and fold them under the bottom crust. Use a fork or your fingers to create a decorative seal.
To ensure the bottom of your pie is as crisp as the top, consider baking on the lowest rack of the oven or using a preheated baking stone. Additionally, cutting several vents in the top crust is non-negotiable. These vents allow steam to escape from the filling; without them, the steam will trapped, making the pastry damp and heavy from the inside out.
Storage, Freezing, and Reheating Tips
One of the best things about Chicken Pot Pie is that it freezes beautifully. You can assemble the pie (without the egg wash) and freeze it for up to three months. When you’re ready to eat, bake it directly from the freezer, adding about 15-20 minutes to the total baking time. For leftovers, reheating in the oven is always superior to the microwave, as it helps the crust regain its original crispness.
Ingredients and Equipment
This nine-inch double-crust pie starts with fully cooked chicken, onions, carrots, celery, peas, butter, flour, chicken broth, milk, thyme, and two ready-made pie crusts. Use a saucepan and whisk to make the gravy before the filling goes into the pastry. Have a pie plate, a rimmed baking sheet, and an egg for brushing the top crust ready.
Measure the ingredients before beginning and keep your work area organized. The detailed quantities and instructions are available in the recipe card below; the sections above explain the techniques that make the dish successful.
How to Make Classic Chicken Pot Pie
Step 1: Preheat the Oven and Prepare the Pie Plate
Preheat your oven to 425°F (220°C).
Step 2: Soften Onion, Carrot, and Celery
In a large saucepan, melt the butter over medium heat. Add the onions, carrots, and celery. Cook for 5-7 minutes until softened.
Step 3: Cook Butter and Flour into a Roux
Stir in the flour, salt, pepper, and thyme. Cook for 2 minutes to remove the raw flour taste, stirring constantly.
Step 4: Whisk in Broth and Milk
Slowly whisk in the chicken broth and milk. Continue to simmer and whisk until the sauce thickens and bubbles.
Step 5: Fold in Chicken and Peas
Stir in the cooked chicken and frozen peas. Remove from heat.
Step 6: Fit the Bottom Pastry Crust
Place one pie crust into a 9-inch pie plate. Pour the warm filling into the bottom crust.
Step 7: Seal the Top Crust and Cut Vents
Top with the second pie crust. Trim the edges and crimp to seal. Cut 3-4 small slits in the top to allow steam to escape.
Step 8: Brush the Pastry with Egg Wash
Brush the top crust with a beaten egg for a golden finish.
Step 9: Bake Until Golden and Bubbling
Bake for 35-40 minutes, or until the crust is golden brown. Let it rest for 10 minutes before serving.
Practical Tips for Consistent Results
Start with cooked chicken, cut into bite-size pieces that can be distributed evenly through the pie. Shredded breast or thigh meat works, provided the pieces are not too large. Cold leftovers can be used, but the assembled pie still needs to heat thoroughly to 165°F (74°C) at the center.
The flour-and-butter roux is the heart of the filling. Let the flour cook briefly in the melted butter before slowly pouring in the broth and milk. Whisk as you add liquid, especially around the bottom corners of the pan. A smooth sauce should lightly coat a spoon rather than run like broth.
Avoid pouring an excessively runny filling into the pastry. If the gravy is too thin, simmer briefly until it thickens before adding chicken and peas. Keep the mixture warm rather than boiling hard after adding the cooked chicken. Cut several slits in the top crust to release steam while the pie bakes.
Crimp the crust edges firmly, place the pie dish on a rimmed baking sheet, and use a foil shield if the edge browns ahead of the center. A fifteen-minute rest after baking helps the filling set. Cutting the pie immediately often makes the sauce run out, even when the ingredients were measured correctly.
Serving Ideas and Variations
Serve a modest slice of pot pie with a leafy salad, roasted broccoli, or sliced tomatoes. For another comforting chicken recipe, the lemon chicken orzo soup offers a broth-based alternative, while creamy tomato basil soup pairs well with a simple green lunch.
When adjusting the recipe, make one change at a time and record how it affects the texture or cooking time. Substituting a different cut of meat, type of pasta, or baking dish may require a different method. Keep the basic proportions unchanged the first time so you can judge the original result before experimenting.
How to Keep the Pastry Crisp
Work with pastry that is chilled but flexible enough to drape into the pie plate without tearing. If the crust becomes warm and sticky during assembly, refrigerate the prepared pie briefly before baking. This helps the layers stay defined and makes it easier to crimp the edge. Avoid stretching the pastry across the dish because stretched dough tends to shrink as it heats.
Keep the filling thick enough to mound softly on a spoon. The gravy should coat chicken and vegetables without running to the bottom of the saucepan like broth. If the mixture seems loose, simmer it for a few extra minutes and stir so it does not stick. An overly watery filling can soak the lower pastry before it has time to bake. A preheated baking sheet under the pie plate can help the bottom receive steady heat, provided your dish is oven-safe for that method.
A few small vents in the top crust allow steam to escape and reduce pressure against the pastry. Brush with a thin egg wash rather than letting it pool near the crimped edge. Once the pie is golden and the center is safely hot, remove it from the oven and rest for fifteen minutes. The sauce thickens slightly as it stands, which makes the first portion much easier to serve neatly.
Storage and Food Safety
Cool cooked food promptly and refrigerate within two hours in shallow containers at 40°F (4°C) or below. For most cooked leftovers, plan to use them within three to four days. Use FoodSafety.gov’s cold-storage guidance to check a specific dish. Reheat leftovers containing cooked meat or poultry to 165°F (74°C).
Freeze portions that you will not use within the refrigerator window, with the date marked on each container. Thaw frozen cooked food in the refrigerator or with an appropriate controlled method, never for hours on the kitchen counter. Texture may change after thawing, especially for creamy sauces, flaky crusts, or crisp coatings.
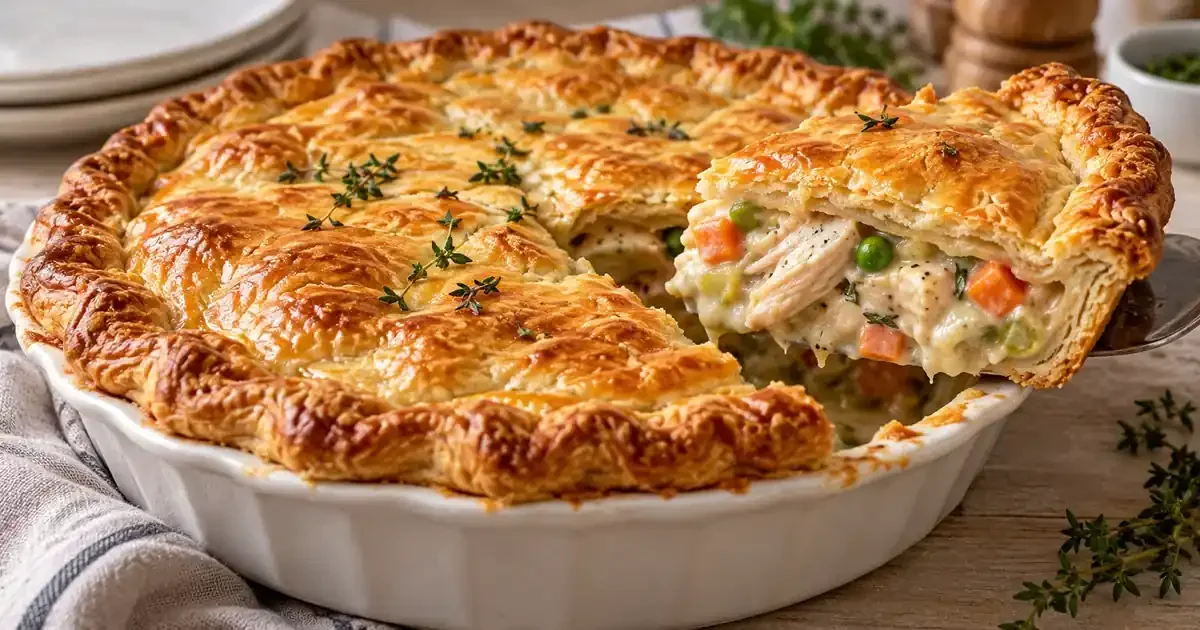
Classic Chicken Pot Pie with Flaky Crust
Ingredients
Equipment
Method
- Preheat your oven to 425°F (220°C).
- In a large saucepan, melt the butter over medium heat. Add the onions, carrots, and celery. Cook for 5-7 minutes until softened.
- Stir in the flour, salt, pepper, and thyme. Cook for 2 minutes to remove the raw flour taste, stirring constantly.
- Slowly whisk in the chicken broth and milk. Continue to simmer and whisk until the sauce thickens and bubbles.
- Stir in the cooked chicken and frozen peas. Remove from heat.
- Place one pie crust into a 9-inch pie plate. Pour the warm filling into the bottom crust.
- Top with the second pie crust. Trim the edges and crimp to seal. Cut 3-4 small slits in the top to allow steam to escape.
- Brush the top crust with a beaten egg for a golden finish.
- Bake for 35-40 minutes, or until the crust is golden brown. Let it rest for 10 minutes before serving.
Notes
Frequently Asked Questions
Can I use leftover cooked chicken?
Yes. Chopped or shredded fully cooked chicken works well. Keep it refrigerated until you prepare the filling.
How do I prevent a soggy bottom crust?
Use a thick gravy rather than a watery filling, do not overload the pie with liquid, and bake on a preheated baking sheet if your pie plate allows it.
Can I use only a top crust?
Yes. This becomes a top-crust pot pie rather than a double-crust version. Adjust the dish and watch the bake time.
How long should chicken pot pie rest?
Allow at least fifteen minutes for the filling to thicken slightly and for safer, neater serving.
Can I freeze chicken pot pie?
Yes, but allow safe cooling and wrap carefully. Reheat cooked portions until the center reaches 165°F; pastry texture may soften after freezing.
Make This Recipe Again
With the ingredients measured and the main cooking checkpoints understood, the recipe is straightforward to repeat. Pay attention to the signs of doneness and texture described above rather than relying on the clock alone. Serve fresh when possible, and store any leftovers promptly for a later meal.