
Crispy southern fried chicken starts with two jobs that must be done separately: season the meat well and build a craggy flour coating that stays attached in hot oil. A buttermilk soak helps the seasoning distribute through the chicken, while a flour-and-cornstarch dredge creates a golden exterior.
This recipe uses bone-in chicken pieces rather than boneless strips. That means timing depends on the cut and thickness. Oil temperature and a thermometer are essential, especially when breasts and drumsticks are fried in the same batch. The aim is juicy, safely cooked chicken with an evenly crisp crust.
Understanding the Perfect Crust
The hallmark of great Southern Fried Chicken is the contrast between the craggy, crispy exterior and the succulent, steaming meat inside. Achieving this requires an understanding of food science. The crust is essentially a dehydrated layer of flour and protein that undergoes the Maillard reaction, a chemical reaction between amino acids and reducing sugars that gives browned food its distinctive flavor.
While All-Purpose flour is the standard, many professional chefs incorporate a percentage of cornstarch or rice flour into their dredge. Cornstarch interferes with gluten development, resulting in a lighter, crispier texture that stays crunchy longer. A ratio of 75% flour to 25% cornstarch is often cited as the “sweet spot” for home cooks. This ensures the coating is sturdy enough to cling to the chicken but delicate enough to shatter upon the first bite.
The Importance of the Brine
Before the chicken ever touches the flour, it must be seasoned from the inside out. Brining serves two purposes: it seasons the meat and breaks down muscle fibers to ensure tenderness. A dry brine involves rubbing the chicken with salt and spices and letting it rest, while a wet brine involves submerging it in a liquid solution.
Mastering the Fry: Oil and Temperature
Peanut oil is widely considered the best for frying chicken due to its high smoke point (around 450°F) and neutral flavor. However, for those with allergies, canola or sunflower oil are excellent alternatives. These oils allow the chicken to cook at the necessary 350°F without the oil breaking down and imparting a bitter, burnt taste. Always ensure your oil is fresh; reused oil can carry flavors from previous meals and lower the smoke point.
The oil should ideally be between 325°F and 350°F. If the oil is too cold, the chicken will absorb the fat and become greasy. If it is too hot, the exterior will burn before the interior is safely cooked to 165°F. Using a cast-iron skillet is highly recommended as it retains heat better than stainless steel or aluminum, preventing the temperature from dropping too sharply when the cold chicken is added.
Step-by-Step Technique for Success
The “Double Dredge” is the secret to those big, flaky bits of crust. After removing the chicken from the buttermilk, toss it in the seasoned flour, dip it back into the buttermilk briefly, and then back into the flour. This creates a thick, textured coating. Once dredged, let the chicken rest on a wire rack for 10-15 minutes before frying. This “sets” the coating, preventing it from falling off in the pan.
Common Cooking Problems
One frequent issue is the “bald” chicken, where the skin slides off the meat. This is usually caused by the chicken being too wet when it enters the flour or the oil not being hot enough. Another issue is the “bloody bone,” which happens when chicken is fried straight from the refrigerator. Let your marinated chicken sit at room temperature for about 20 minutes before frying to ensure even cooking.
Ingredients and Equipment
Use a whole chicken cut into serving pieces, buttermilk, and a mild vinegar-based hot sauce for the marinade. The crust combines all-purpose flour, cornstarch, salt, pepper, paprika, garlic powder, and onion powder, with cayenne if you prefer heat. Prepare a wide dredging dish, a deep heavy pot, a frying thermometer, a clean wire rack, and a separate meat thermometer.
Measure the ingredients before beginning and keep your work area organized. The detailed quantities and instructions are available in the recipe card below; the sections above explain the techniques that make the dish successful.
How to Make Southern Fried Chicken
Step 1: Marinate Chicken in Buttermilk
In a large bowl, combine the chicken pieces, buttermilk, and hot sauce. Ensure the chicken is fully submerged. Cover and refrigerate for at least 4 hours, or overnight.
Step 2: Combine the Seasoned Flour
In a large shallow dish or heavy-duty paper bag, whisk together the flour, cornstarch, salt, pepper, paprika, garlic powder, onion powder, and cayenne.
Step 3: Dredge Each Chicken Piece
Remove chicken from the buttermilk, letting excess drip off. Dredge each piece in the flour mixture, pressing firmly to adhere.
Step 4: Add a Second Dredge for Extra Crunch
For extra crunch, dip the floured chicken back into the buttermilk and then back into the flour (double dredge).
Step 5: Let the Coating Set on a Rack
Place the coated chicken on a wire rack and let it rest for 15-20 minutes. This is crucial for the crust to set.
Step 6: Heat the Frying Oil
Fill a large cast-iron skillet or deep pot with about 2 inches of oil. Heat to 350°F (175°C).
Step 7: Fry Chicken in Small Batches
Carefully add chicken pieces to the oil, being careful not to overcrowd the pan. Fry in batches if necessary.
Step 8: Check Each Piece for Doneness
Fry in batches, turning as needed. Cook until the crust is golden and every piece reaches 165°F (74°C), checking thick pieces near the bone; frying time varies by cut and size.
Step 9: Drain and Rest on a Wire Rack
Drain the chicken on a wire rack over a paper-towel-lined tray. Let rest for 5-10 minutes before serving.
Practical Tips for Consistent Results
Give the buttermilk time to coat and season the chicken in the refrigerator. Four hours is a useful minimum; overnight is convenient when preparing ahead. Drain excess marinade before dredging so the flour becomes a slightly rough coating instead of a wet batter. Discard any leftover marinade that touched raw chicken.
Press seasoned flour onto each piece, particularly around folds in the skin. A second light dredge adds extra ridges, but the coating should not be so thick that it tastes doughy. Let the coated chicken rest on a wire rack while the oil heats so the flour hydrates and adheres more reliably.
Keep the oil around 325–350°F (163–177°C) during frying and allow it to recover between batches. Dropping too many cold pieces into a small pot can cool the oil sharply and produce a greasy crust. A deep, heavy pan reduces temperature swings, but always leave headroom to prevent hot oil from spilling.
Never rely on crust color alone to decide whether bone-in chicken is cooked. The thickest part of each piece must reach 165°F (74°C), measured away from the bone. Some pieces require longer than others; remove the smaller pieces first when they are ready. Rest on a rack rather than sealing hot fried chicken in a covered container.
Serving Ideas and Variations
Serve the chicken with cabbage slaw, corn, roasted vegetables, or a side salad. For a different comforting chicken meal, JonasRecipes has a lemon chicken orzo soup and a chicken and potatoes dinner.
When adjusting the recipe, make one change at a time and record how it affects the texture or cooking time. Substituting a different cut of meat, type of pasta, or baking dish may require a different method. Keep the basic proportions unchanged the first time so you can judge the original result before experimenting.
Storage and Food Safety
Cool cooked food promptly and refrigerate within two hours in shallow containers at 40°F (4°C) or below. For most cooked leftovers, plan to use them within three to four days. Use FoodSafety.gov’s cold-storage guidance to check a specific dish. Reheat leftovers containing cooked meat or poultry to 165°F (74°C).
Freeze portions that you will not use within the refrigerator window, with the date marked on each container. Thaw frozen cooked food in the refrigerator or with an appropriate controlled method, never for hours on the kitchen counter. Texture may change after thawing, especially for creamy sauces, flaky crusts, or crisp coatings.
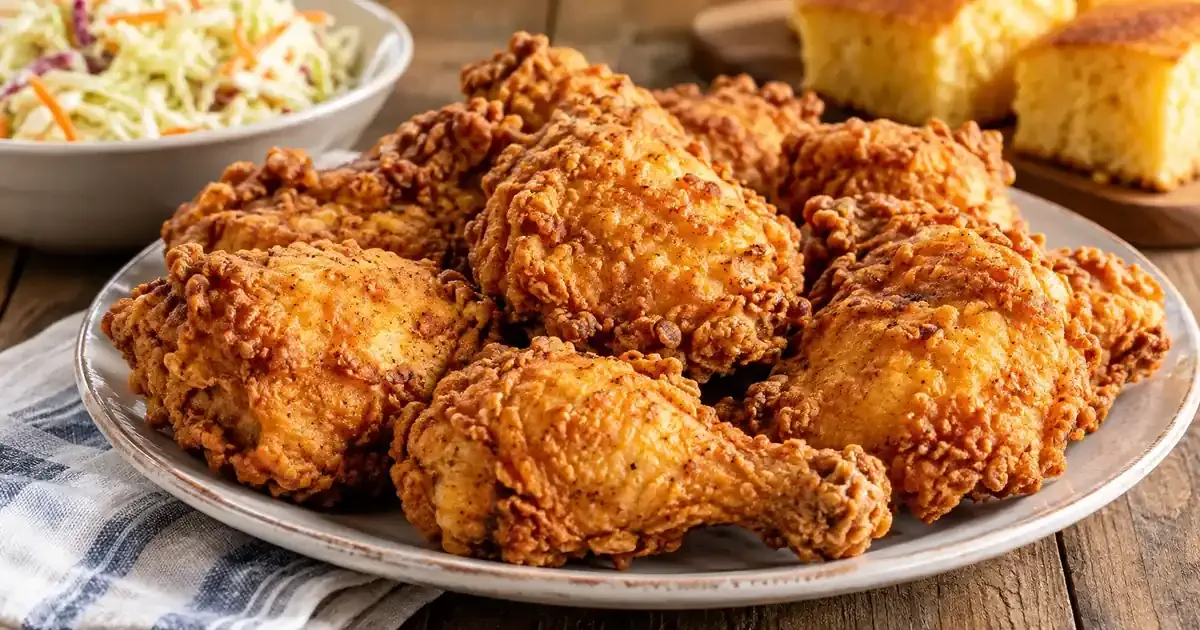
Crispy Southern Fried Chicken with Buttermilk
Ingredients
Equipment
Method
- In a large bowl, combine the chicken pieces, buttermilk, and hot sauce. Ensure the chicken is fully submerged. Cover and refrigerate for at least 4 hours, or overnight.
- In a large shallow dish or heavy-duty paper bag, whisk together the flour, cornstarch, salt, pepper, paprika, garlic powder, onion powder, and cayenne.
- Remove chicken from the buttermilk, letting excess drip off. Dredge each piece in the flour mixture, pressing firmly to adhere.
- For extra crunch, dip the floured chicken back into the buttermilk and then back into the flour (double dredge).
- Place the coated chicken on a wire rack and let it rest for 15-20 minutes. This is crucial for the crust to set.
- Fill a large cast-iron skillet or deep pot with about 2 inches of oil. Heat to 350°F (175°C).
- Carefully add chicken pieces to the oil, being careful not to overcrowd the pan. Fry in batches if necessary.
- Fry in batches, turning as needed. Cook until the crust is golden and every piece reaches 165°F (74°C), checking thick pieces near the bone; frying time varies by cut and size.
- Drain the chicken on a wire rack over a paper-towel-lined tray. Let rest for 5-10 minutes before serving.
Notes
Frequently Asked Questions
How do I keep fried chicken crispy?
Drain freshly cooked chicken on a wire rack, not in a covered bowl. Steam trapped under a lid or directly against paper towels can soften the coating.
How hot should the frying oil be?
Aim for roughly 325–350°F and monitor with a thermometer. The temperature falls when chicken is added, so smaller batches help.
Can I use boneless chicken?
Yes, but the cook time changes substantially. This recipe is written for bone-in pieces, so check each piece with a thermometer.
Can I marinate chicken overnight?
Yes. Keep it covered in the refrigerator and discard the used marinade. Do not leave raw chicken soaking at room temperature.
What internal temperature is safe?
Chicken needs to reach 165°F (74°C) in the thickest part, away from the bone. The color of the crust does not prove the center is done.
Make This Recipe Again
With the ingredients measured and the main cooking checkpoints understood, the recipe is straightforward to repeat. Pay attention to the signs of doneness and texture described above rather than relying on the clock alone. Serve fresh when possible, and store any leftovers promptly for a later meal.